Transporting and installing a container home in 2026 requires more than arranging a truck and a crane. The project begins with a clear site assessment, an accurate container inspection, and a realistic delivery plan. This guide explains how to transport and install a container home safely, efficiently, and with fewer expensive surprises. Every site is different. Soil, access roads, overhead wires, local permits, and weather can change the entire process. A narrow gate may matter more than the distance from the factory.
Experienced installers confirm the container’s dimensions, weight, lifting points, and structural condition before loading. They also measure turning areas, bridge limits, slopes, and crane reach. Small mistakes become large costs. A delayed crane or unsuitable trailer can leave a home waiting beside the road. Reliable planning includes qualified engineers, approved transport providers, foundation details, utility routes, and contingency time. Requirements vary by location, so local building officials and certified professionals should verify the design before work begins.
This article covers practical decisions, from selecting a transport method to placing the unit level on its foundation. Preparation often matters more than speed. It is easy to underestimate the details. Container homes are not automatically simple or inexpensive. Cutting corners can cause water leaks, floor movement, damaged panels, or unsafe connections. Even a few centimeters of misalignment may affect doors, plumbing, and insulation. Careful measurements, documented inspections, and honest communication create a stronger installation. The best result is not merely a container that arrives. It is a secure, code-compliant home that performs reliably for years.
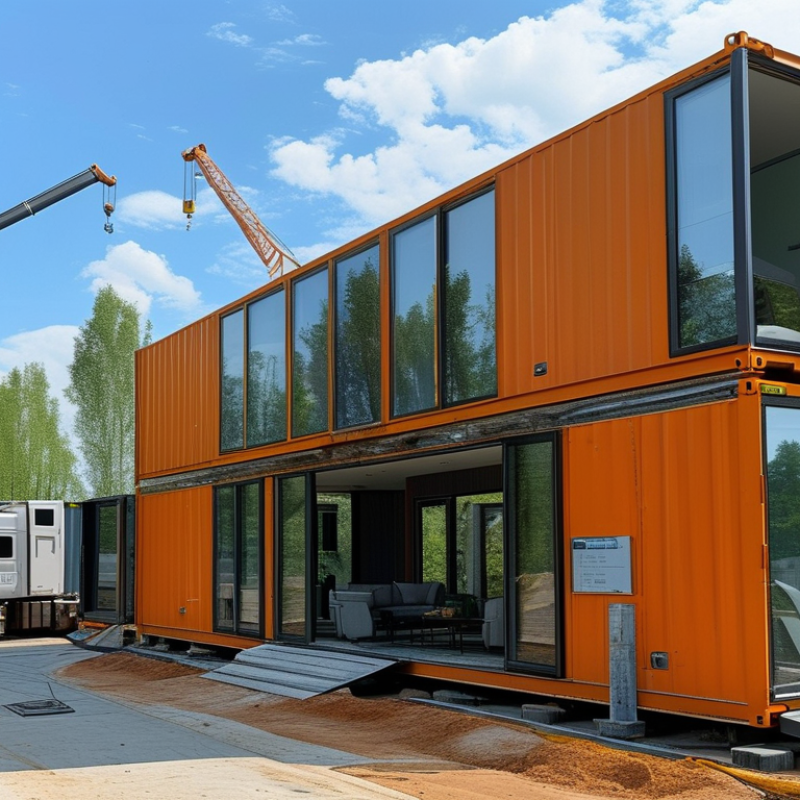
A successful container home begins with the land, not the floor plan. Visit the site before ordering anything. Measure slope, soil conditions, drainage paths, and the available turning space. Check overhead cables, narrow gates, bridges, and road weight limits. A 40-foot unit may fit the plot but still fail at the entrance. Access matters.
Soft soil needs professional assessment, especially after heavy rain. A geotechnical engineer can recommend footings that prevent settlement and twisting. The delivery area should be firm, level, and clear enough for lifting equipment. Leave room for stabilizing outriggers. I once underestimated a driveway’s turning angle; the delivery plan had to change. That mistake was avoidable.
Choose the container home around the site’s real demands. In a hot climate, prioritize shade, cross-ventilation, roof insulation, and efficient cooling. In cold or wet regions, focus on insulation, vapor control, drainage, and protected entrances. Window placement should consider wind, privacy, and morning sunlight. Keep structural openings professionally reinforced. Ask for drawings showing load paths, insulation values, electrical routes, and plumbing access. Confirm transport dimensions before selecting interior finishes. Small details become expensive when discovered after delivery. A careful site survey may feel slow, but it reveals whether the home, foundation, and transport method truly belong together.
| Assessment or Decision Factor | Typical Data or Site Requirement | Recommended Option | Transport and Installation Implication | Planning Notes |
|---|---|---|---|---|
| Container length | 20-foot units are approximately 6.06 m long; 40-foot units are approximately 12.19 m long. External width is generally about 2.44 m. | Choose a 20-foot unit for compact sites and a 40-foot unit for larger floor areas. | A 40-foot unit normally needs a longer, wider route and more lifting space at the destination. | Confirm the actual manufactured dimensions, including insulation, cladding, roof overhangs, and protruding services. |
| Transport weight | An empty steel container commonly weighs about 2.2–4.0 metric tonnes, while a finished home may weigh substantially more depending on fit-out and structural modifications. | Use a transport vehicle and lifting equipment rated above the verified gross weight. | The carrier must check axle limits, bridge restrictions, permits, and the safe working load of the crane or specialized trailer. | Do not estimate lifting capacity from container length alone; request a final shipping weight before booking equipment. |
| Road access | Check road width, turning radius, overhead cables, bridge limits, steep grades, soft shoulders, and gate openings. | Select a shorter unit or sectional installation if the route cannot accommodate the full module. | A route survey should be completed before delivery. Temporary removal of gates or overhead obstructions may be necessary. | Measure the narrowest point, not the average road width, and allow additional clearance for mirrors and trailer movement. |
| Turning and positioning area | The delivery vehicle needs a stable setup area and enough space to align, reverse, or be positioned by a crane. | Use direct truck placement where access is simple; use a crane lift where the home must clear obstacles or reach a prepared foundation. | Crane setup requires level ground, outrigger clearance, safe lifting radius, and confirmation that underground utilities will not be damaged. | The lifting plan should state the load weight, lifting points, radius, wind limits, exclusion zone, and communication method. |
| Ground bearing capacity | The site must support the foundation, container, occupants, furniture, snow or wind loads, and temporary construction equipment. | Use a site-specific foundation design based on soil conditions and local structural requirements. | Soft or saturated soil may require stabilization, wider pads, piles, or a reinforced foundation before delivery. | A geotechnical assessment is especially important on filled land, slopes, flood-prone sites, and areas with expansive clay. |
| Foundation type | Common solutions include concrete piers, strip footings, slabs, helical piles, and other engineered systems. | Choose the foundation according to soil, frost depth, flood risk, drainage, and the container manufacturer’s support-point requirements. | The foundation must be level and accurately positioned before the unit arrives; correcting errors after placement is difficult and costly. | Provide access for inspection, drainage, utility connections, and future maintenance beneath the home. |
| Site slope and drainage | Sloping sites increase foundation complexity and can affect truck stability, crane setup, surface water, and erosion. | Use engineered stepped foundations or piles where practical; avoid placing the unit directly on ungraded soil. | Delivery may require a temporary access road, compacted working platform, or staged lifting operation. | Keep water away from the foundation with suitable grading, gutters, downspouts, and site drainage. |
| Weather and wind exposure | Wind, ice, snow, seismic activity, and local exposure categories influence structural design and lifting safety. | Use a locally engineered design with suitable anchoring, bracing, insulation, and roof loading capacity. | Crane operations may need to be postponed during excessive wind, lightning, heavy rain, or poor visibility. | A finished container home is not automatically suitable for every climate; verify regional code loads and corrosion protection. |
| Utilities and service connections | Electricity, water, wastewater, stormwater, internet, and fuel services must be available or planned. | Coordinate connection points before transport and keep shutoff locations accessible. | Pre-installed connections can reduce onsite work, but they must be protected during loading, transport, and lifting. | Remote sites may need a septic system, water storage, solar equipment, generator, or upgraded utility service. |
| Permits and compliance | Requirements may include planning approval, building permits, transport permits, road access approval, electrical inspection, and wastewater approval. | Confirm all approvals with the relevant local authorities before fabrication or delivery. | Transport dates should be scheduled only after route, site, and permit conditions are confirmed. | Rules vary by location and intended use; a container classified as a permanent dwelling may be regulated like other residential construction. |
| Transport method | Options include a flatbed trailer, tilt-bed trailer, low-loader, or specialized modular-home carrier. | Choose the lowest-risk method that matches the verified dimensions, weight, road route, and unloading plan. | Tilt-bed delivery may work for accessible sites; crane-assisted placement is better where the unit must be lifted over obstacles. | The carrier should confirm tie-down points and protect windows, cladding, doors, plumbing, and electrical components. |
| Onsite installation sequence | A typical sequence is foundation inspection, delivery, placement, leveling, anchoring, utility connection, weather sealing, and final inspection. | Use a written installation plan with named responsibilities and inspection checkpoints. | The site should be ready before the truck or crane arrives to minimize waiting time and equipment rental exposure. | Document the condition of the home before unloading and inspect for movement or damage after placement. |
| Final selection rule | The best container home is the largest and most practical unit that can be legally transported, safely lifted, properly supported, and connected to services. | Prioritize site compatibility and lifecycle performance over floor area alone. | A smaller unit with straightforward access can be more economical than a larger unit requiring major road and foundation work. | Obtain a route survey, foundation design, verified shipping weight, lifting plan, and local approval before committing to the final configuration. |
Planning values are typical industry ranges and general guidance. Final dimensions, weights, equipment capacities, foundation designs, permits, and safety requirements must be verified for the specific home, site, route, climate, and local jurisdiction.
: Visit the land and measure slope, soil, drainage, access, and turning space. Check gates, bridges, cables, and road limits. Access matters.
Soft soil may settle after rain. Ask a geotechnical professional to assess it and recommend suitable footings. Do not guess.
Hot areas need shade, cross-ventilation, roof insulation, and efficient cooling. Cold or wet areas need insulation, vapor control, and drainage. Weather changes everything.
Confirm the foundation size, level, anchor locations, transport dimensions, and lifting space. Leave room for stabilizing equipment. Measure twice.
Use qualified lifting operators and equipment suited to the measured weight. Keep people outside the lifting zone. Guide placement slowly. Never rush a lift.
Uneven placement can twist the structure and stop doors from closing. Correct the foundation or supports instead of forcing alignment. Small errors matter.
Use qualified electrical and plumbing support. Label conduits, protect fittings, and keep shutoff valves accessible. Avoid buried junctions and valves. Leave access.
Keep permits, approved drawings, test results, equipment records, and dated photographs together. Inspectors may check alarms, exits, anchoring, wiring, and sanitation. Paperwork reveals gaps.
Complete required inspections before covering wiring or pipes. Walk through every service route, even when the work appears finished. I once missed drain access. Reopening a wall caused delays.
Transporting and installing a container home requires careful planning from the site assessment through final inspection. The process begins by evaluating ground conditions, access, drainage, space, and local building requirements before selecting a container home that suits the property. The structure should then be prepared for safe and legal transport by securing doors, windows, interior fixtures, and any removable components. Proper lifting points, transport equipment, route planning, permits, and qualified professionals are essential to reduce risks during delivery.
Once on site, the container home must be positioned accurately on a properly designed foundation, checked for level, and secured against movement. Installation may include joining sections, reinforcing openings, sealing connections, and protecting the structure from moisture. Utilities such as electricity, water, drainage, heating, and communications should be connected by qualified specialists. Final safety inspections should confirm structural stability, fire protection, utility performance, and compliance with applicable local requirements. This practical approach explains how to transport and install a container home safely, efficiently, and responsibly.

 Stinson Modular Homes