Designing a modern container living space requires more than placing a steel box on a foundation. It demands careful planning, practical experience, and respect for the container’s original structure. This guide explores how to design a modern container living space with seven realistic strategies. These ideas cover layout planning, insulation, daylight, ventilation, material selection, structural safety, and energy efficiency.
Architect Adam Kalkin, widely recognized for innovative container architecture, once said, “I like the idea of the container because it’s a really strong, inexpensive, modular building block.” His observation explains both the opportunity and the limitation. A container offers strength and flexibility, but it can also feel narrow, dark, and industrial. Good design must respond to those weaknesses.
Think about a 40-foot container with a glazed side wall, pale plywood panels, and polished concrete flooring. That combination can create openness without hiding the building’s character. However, large openings may require professional structural review. Steel also transfers heat quickly, so insulation and moisture control cannot be treated as optional details. They affect comfort, durability, and indoor air quality.
Some solutions may look beautiful online but perform poorly in real weather. That matters. A modern space should work during a hot afternoon, a cold night, and a heavy rainstorm. The following seven approaches focus on balanced decisions rather than perfect images. They also leave room for reflection, because every site, budget, and household creates different design challenges.
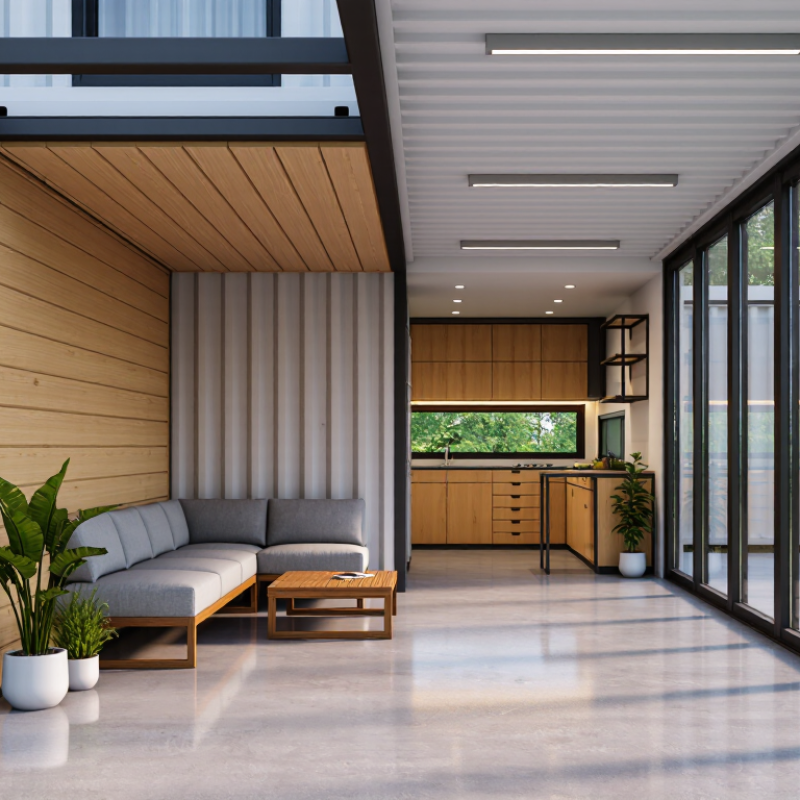
A modern container home begins with a clear purpose, not attractive finishes. Decide whether it will serve as a full-time residence, guest suite, office, or weekend retreat. Each use changes the required insulation, storage, plumbing, and ventilation. A family home needs durable flooring and generous circulation space. A guest unit may work with a compact kitchenette and one flexible room.
Measure the container interior before drawing the layout. Steel walls reduce usable width, especially after insulation and service cavities are added. Place bedrooms away from noisy equipment, and keep bathrooms near shared plumbing lines. Large windows can improve daylight, but they also increase heat gain and reduce privacy. Test the furniture arrangement with cardboard outlines. It exposes awkward door swings quickly.
Core requirements should include structural inspection, moisture control, safe electrical planning, and reliable emergency exits. Consult qualified professionals for local building requirements and foundation conditions. In practice, small oversights become expensive. A poorly placed drain can force changes across the entire floor plan. I once underestimated the space needed for mechanical access; the room looked efficient on paper, but maintenance became uncomfortable. Leave service gaps, even when every square metre feels valuable. A beautiful layout is not successful if it is difficult to repair, heat, or live in.
| No. | Design Approach | Purpose and Recommended Use | Layout and Space-Planning Guidance | Core Requirements |
|---|---|---|---|---|
| 1 | Create a Clear Living-Zone Plan | Use the container as a compact primary residence, guest suite, or weekend retreat. Establish the required rooms before selecting doors, windows, and furniture. | Group the kitchen, bathroom, and utility connections to reduce circulation and service runs. Keep the main living area near the best source of daylight. | A written room schedule, furniture dimensions, accessible circulation routes, and a realistic storage plan. Local planning and building regulations should be checked before construction. |
| 2 | Choose the Right Container Configuration | Match the number and size of containers to occupancy, privacy, and budget. A standard 20-foot container is approximately 20 feet long, while a standard 40-foot container is approximately 40 feet long. | Use one container for a compact studio or a simple guest unit. Combine containers when separate bedrooms, larger living areas, or wider shared spaces are needed. | Verify external and internal dimensions, structural condition, delivery access, crane or lifting access, and the engineering implications of removing side panels or end walls. |
| 3 | Prioritize Daylight and Natural Ventilation | Make the compact interior feel more spacious, comfortable, and connected to the outdoors by positioning openings around the daily activity zones. | Place larger glazed openings in living and dining areas where possible. Use high-level windows, operable windows, or rooflights to support cross-ventilation without sacrificing privacy. | Properly sized windows, weatherproof flashing, insect screens, shading devices, and compliance with local requirements for emergency escape, ventilation, and energy performance. |
| 4 | Build a Complete Thermal and Moisture Strategy | Prevent uncomfortable indoor temperatures, condensation, corrosion, and mold in the steel enclosure. | Reserve enough wall, ceiling, and floor depth for continuous insulation. Coordinate insulation with window frames, service cavities, and interior finishes. | Continuous insulation, vapor and air-control layers appropriate to the climate, thermal-bridge treatment, a ventilated or conditioned interior, and moisture-resistant detailing at penetrations. |
| 5 | Design Flexible, Multifunctional Interiors | Increase usefulness in a limited footprint by allowing one area to support several activities, such as working, dining, relaxing, and sleeping. | Use built-in benches with storage, fold-down desks, sliding doors, nesting tables, and movable partitions. Keep frequently used circulation paths free of bulky furniture. | Accurate furniture measurements, durable hardware, safe clearances, accessible electrical outlets, and storage for seasonal, cleaning, and utility items. |
| 6 | Concentrate Plumbing and Utility Services | Simplify installation and maintenance by organizing water, drainage, electrical, heating, and ventilation systems around a compact service zone. | Place the kitchen and bathroom back-to-back or along the same service wall where practical. Keep inspection points and shutoff valves accessible. | Properly sized electrical service, protected wiring, water and waste connections, ventilation for wet rooms, freeze protection where required, and code-compliant access for maintenance. |
| 7 | Integrate Outdoor Space and Future Adaptability | Extend the usable living area with a deck, covered entry, patio, or garden while allowing the home to adapt to changing household needs. | Align the main entrance and living space with the outdoor area. Consider a future bedroom, office, accessibility upgrade, or second container before fixing the foundation and service routes. | A stable foundation suited to the site, safe steps or ramps, weather-protected thresholds, structural review for attachments, drainage management, and reserved capacity for future utilities. |
Decide whether it will be a full-time home, guest suite, office, or weekend retreat. Each purpose changes insulation, storage, plumbing, and ventilation needs. A family needs stronger circulation space. A guest unit can use one flexible room.
Measure the container’s interior after allowing for insulation and service cavities. Mark furniture with cardboard outlines. Test door swings and walking routes. A plan can look efficient but feel cramped.
Keep bedrooms away from noisy equipment. Place bathrooms near shared plumbing lines. Group pipes inside a protected service chase. This reduces wall cutting and makes repairs easier. Leave access to traps and cleanouts.
Inspect rust, welds, roof joints, and floor damage before adding finishes. Use continuous insulation where possible. Seal gaps around windows, doors, and service openings. Leave a drainage cavity behind interior walls. Small gaps matter.
Provide fresh-air inlets and exhaust points for kitchens, bathrooms, and sleeping areas. Keep ducts short and accessible. Operable windows can help. Test airflow after installation, because quiet rooms may still contain stale air.
Use fold-down dining tables, shallow sofas, and storage beneath seats. Sliding doors can divide sleeping areas without using much floor space. Measure walkways with furniture in place. Sixty centimetres may feel too narrow around corners.
Prepare a load schedule for lighting, appliances, heating, and outdoor circuits. Use suitable grounding and protective devices under local requirements. Keep junction boxes accessible. Have qualified professionals inspect concealed wiring before walls close.
Use tall modular shelving and keep main floor areas clear. Reserve one cabinet for tools, filters, and emergency supplies. Keep access panels visible. A hidden bench helps, but it cannot replace proper wardrobe space. I once underestimated this.
Designing a modern container living space begins with a clear understanding of its purpose, occupants, budget, and essential daily requirements. The process of how to design a modern container living space includes choosing suitable containers, planning a practical layout, and connecting units to create comfortable zones for living, cooking, working, and resting. Careful attention should be given to structural changes, insulation, ventilation, plumbing, and electrical systems so the home remains safe, efficient, and comfortable in different seasons.
The interior can feel spacious through multifunctional furniture, built-in storage, sliding doors, and flexible room arrangements. Large windows, skylights, and thoughtful openings can bring in natural light while supporting airflow. Sustainable additions such as energy-efficient systems, rainwater collection, recycled materials, and passive cooling can reduce environmental impact. Finally, decks, balconies, gardens, and shaded outdoor areas can extend the living space and create a stronger connection with nature.

 Stinson Modular Homes